Thursday, May 3, 2012

Final #2: Building the Rocket


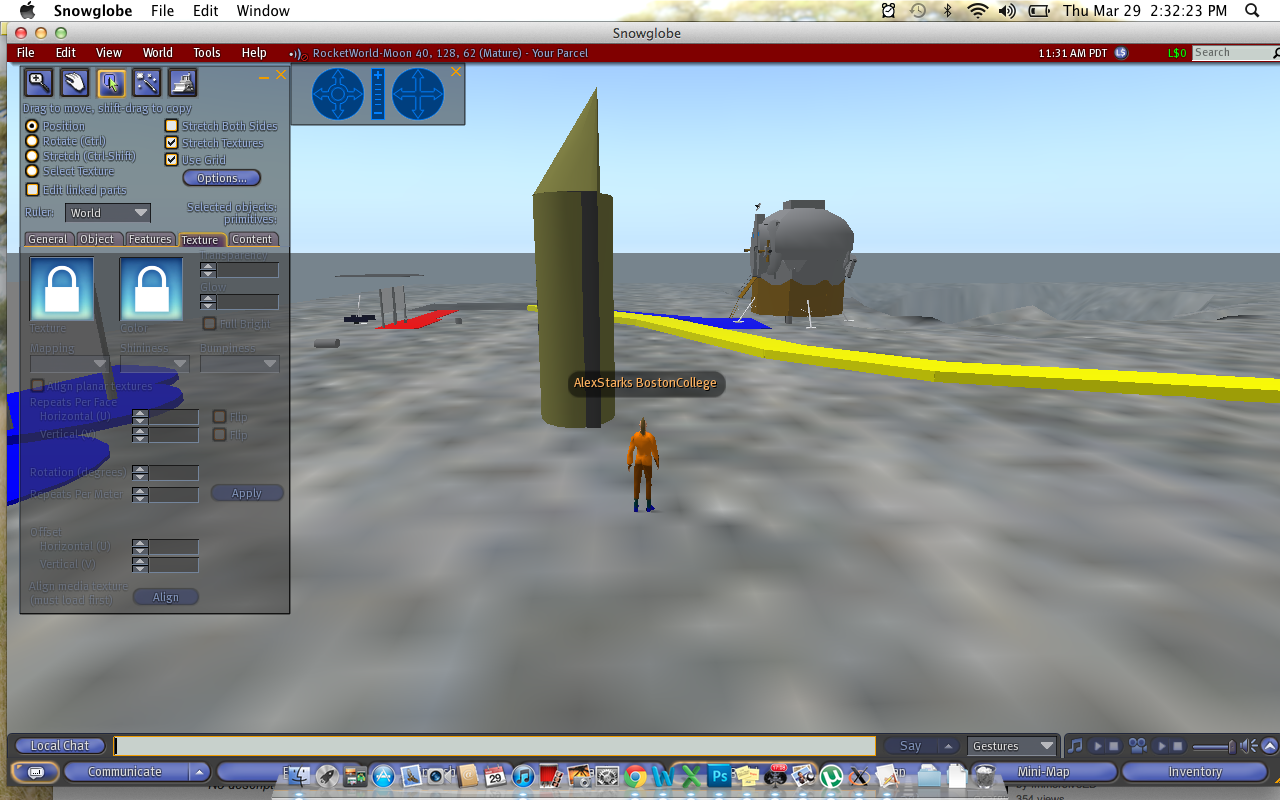
Using a cylinder-shaped prim, I set the height for the body of the rocket.

Then using the X and Y size axises, I set the width of the rocket.

Using a cone-shaped prim, I set it on top of the rocket by copying and pasting the x y-axis coordinates of the base into the coordinates for the cone, then adjusting for the z-axis height to ensure that they were perfectly married.

I then checked the rocket from different angles to ensure that the cone did not overlap the cylinder on any side.

I then changed the rocket's color to give it some character.

The dismantling of the rocket

Leaving RocketWorld just as I found it.

After building the rocket, I then went about attempting to build a more complex shuttle based on this model:



To begin the rocket I built the body out of a cylinder, yet changing the y-axis size in order to make it slightly oblong. I then positioned a hemicone on top  in order to copy the cockpit and windshield.

In order to achieve the correct style of cockpit, I used a second, slightly smaller hemicone and positioned it on the underside of the original.

In order to show the engines and wings effectively, I tilted the shuttle, which required the repositioning of the cockpit at the specific height and angle.


Flattened hemicones were used for the wings of the shuttle, and were placed at the particular angle necessary to perfectly mesh with the shuttle.


I then used ring-shaped prims to serve as the rocket's engines.


I then added color, intentionally transitioning from gray to black in order to provide a better sense of three-dimensionality, depth, and texture.


In doing the assignment I used mathematical calculations to determine specific angles and positional coordinates for each prim, which left a finished structure without gaps or spaces at any angles.


This is essentially a time lapse of an exercise in 3D graphics in an interactive learning environment. The rocket was built through the manipulation of a limited number of shapes. It is a final exercise from the Immersive Education course that I am taking at Boston College. The course is called Discovering Computer Graphics. For details, visit the immersive BC portal at http://ImmersiveEducation.org/@/bc  

Final #1: Flash Images

In this exercise I used flash in order to manipulate and animate Gif images.
Using Photoshop, I created a box image and originally colored it blue. Through flash I was able to use both a bounce animation as well as a color change animation.

In this image I imported the Gif and used a wave animation in order to cause movement.
In the two previous screenshots my name is not originally in the .swf files, but was added later using photoshop's text tool.

In the above image I added the text and followed it with a custom animation wobbling it up.
For the blend of the all three Gif images together I imported the three .swf filed into the final .swf file.

This is a final exercise from the Immersive Education course that I am taking at Boston College. The course is called Discovering Computer Graphics. For details, visit the immersive BC portal at http://ImmersiveEducation.org/@/bc  


Thursday, April 19, 2012

Final #4: Monocular Depth Cues

The above screenshot was taken in Rocket World EMMS, and shows the monocular depth cue of "Size Difference." The first orb is larger than the second (the difference being highlighted with the pen tool in Photoshop), which is demonstrated three-dimensionally by being two-dimensionally larger on the screen. This is one of the elements that give the interactive world depth and a three dimensional feel.

The above screenshot was taken in Rocket World EMMS, and shows the monocular depth cue of Occlusion. The highlighted area shows the shape in the foreground is actually simply superimposed upon the shape in the background given the angle, but due to occlusion it makes the figure in the foreground actually seem closer.

The above screenshot was taken in Rocket World EMMS, and shows the monocular depth cue of "Lighting and Shading." The highlighted area shows what is the precipice of a canyon, which would not be evident were there not different shading along the edge. The dark shading shows that the sun is not hitting that area, which gives the appearance of a shadow casting down into a canyon.


The above screenshots were taken in Rocket World EMMS, and shows the monocular depth cue of "Textural Density." Within the two figures you see the same building, which appears to be made out of wood (highlighted in red). From afar the lines in the "wood" are much closer together, but as one gets nearer the lines get further apart, giving the illusion of distance.

The above screenshot was taken in Rocket World EMMS, and shows the monocular depth cue of "Linear Perspective." The yellow line (highlighted in red) that is used to show the median in the road becomes blurrier and blurrier the further away it is supposed to be. This allows for the eye to perceive the distance, rather than simply seeing a thick yellow line running up the screen.

The above screenshot was taken in Rocket World EMMS, and shows the monocular depth cue of "Atmospheric Perspective." The two areas highlighted above depict two signs, the one on the left meant to be further away, and the one on the right closer. The one on the right is crisp and can be easily read, whereas the one on the left is blurrier and requires a significant amount of focus to read. This allows the virtual world to mimic reality.


This was a study in Monocular Depth Cues that provide a three dimensional sense to two dimensional areas. It is a final exercise from the Immersive Education course that I am taking at Boston College. The course is called Discovering Computer Graphics. For details, visit the immersive BC portal at http://ImmersiveEducation.org/@/bc

Thursday, April 12, 2012

Class 10 Assignment 4

Exploring Wonderland with the generic Avatar.

Experimenting with the text box and chat features within Wonderland.

Attempting to go through the arches in Wonderland (which are evidently hollow despite their appearance.

Modifying my avatar in Wonderland, electing to change the hair style.

Changing the head shape in Wonderland.


In the two above pictures I elected to change the clothing of my Avatar in Wonderland. I decided to give him a polo shirt, suit jacket, slacks, and cowboy boots out of several options within each article of clothing.

Exploring the boundaries of Wonderland, which does not seem to be nearly as large as Rocketworld EMMS. I was only able to access a small area around what appeared to be some sort of villa.

Class 10 Assignment 1

This is a screen shot of the information section of http://TheEducationGrid.org/ highlighting the three major benefits which are that it is "Open 
source," "Royalty Free," and "Openly distributable." 

This is also a screen shot of the information section of http://TheEducationGrid.org/, stating the potential liabilities a younger student might incur, given 
the free nature of the program.


This is a screen shot discussing the security aspect that The Education Grid can offer, specifically the ability for schools to host their own servers and restrict access to those servers. It also discusses the ability for certain servers to allow for broad access, which allows anyone from a specific demographic to access the server.


Thursday, March 29, 2012

Class 9 Assignment 5


Below are the screenshots for the Open Office presentation on building the shuttle in Rocketworld. I began with placing my name on the title page, and subsequently put a screen shot of a different stage in the rocket building process in each following slide, accompanied with a brief description. Between each slide I used the animation feature to trigger different transitions.


Building the Shuttle Screenshots